问题描述
经常需要使用sudo命令,每次都需要输入密码,很麻烦。
使用修改/etc/sudoers文件,添加NOPASSWD参数,可以实现免密码。
操作步骤
打开终端,输入命令:
1
2
3
4
sudo chmod u+w /etc/sudoers
sudo visudo
sudo chmod u+w /etc/sudoers
修改过内容
1
admin ALL=(ALL) NOPASSWD: ALL
记录一次go代码性能调优实践。
由于希望远程看到调试信息,直接使用http方式开启go的pprof调试
1 | package main |
浏览器方法就能看到如下页面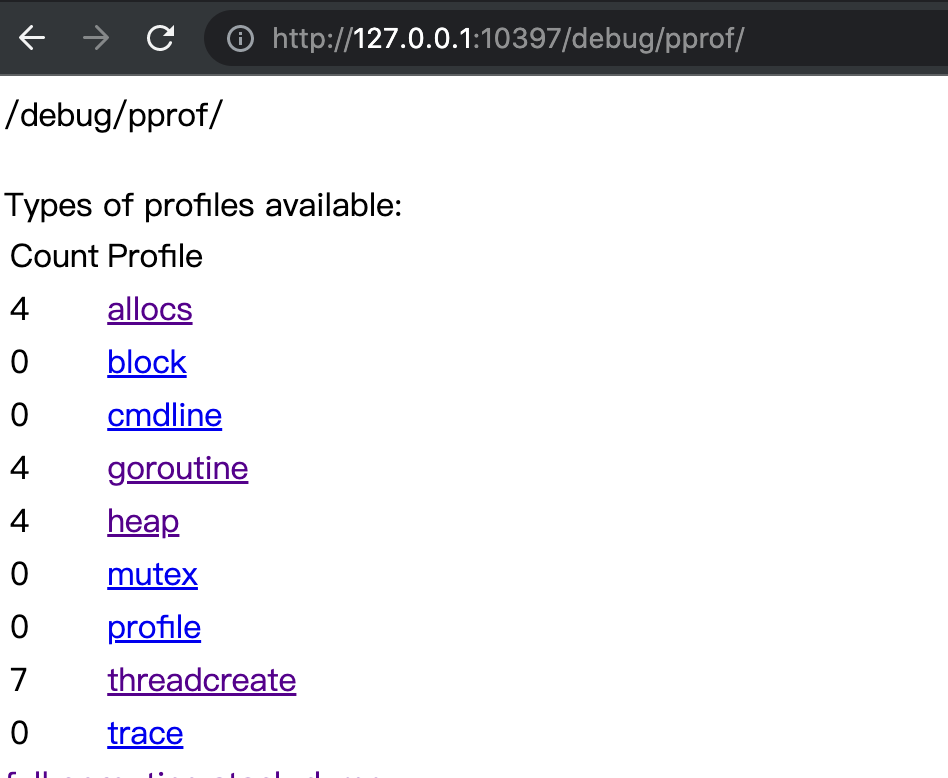
这个页面非常好用,可以实时看到程序实时运行效果。
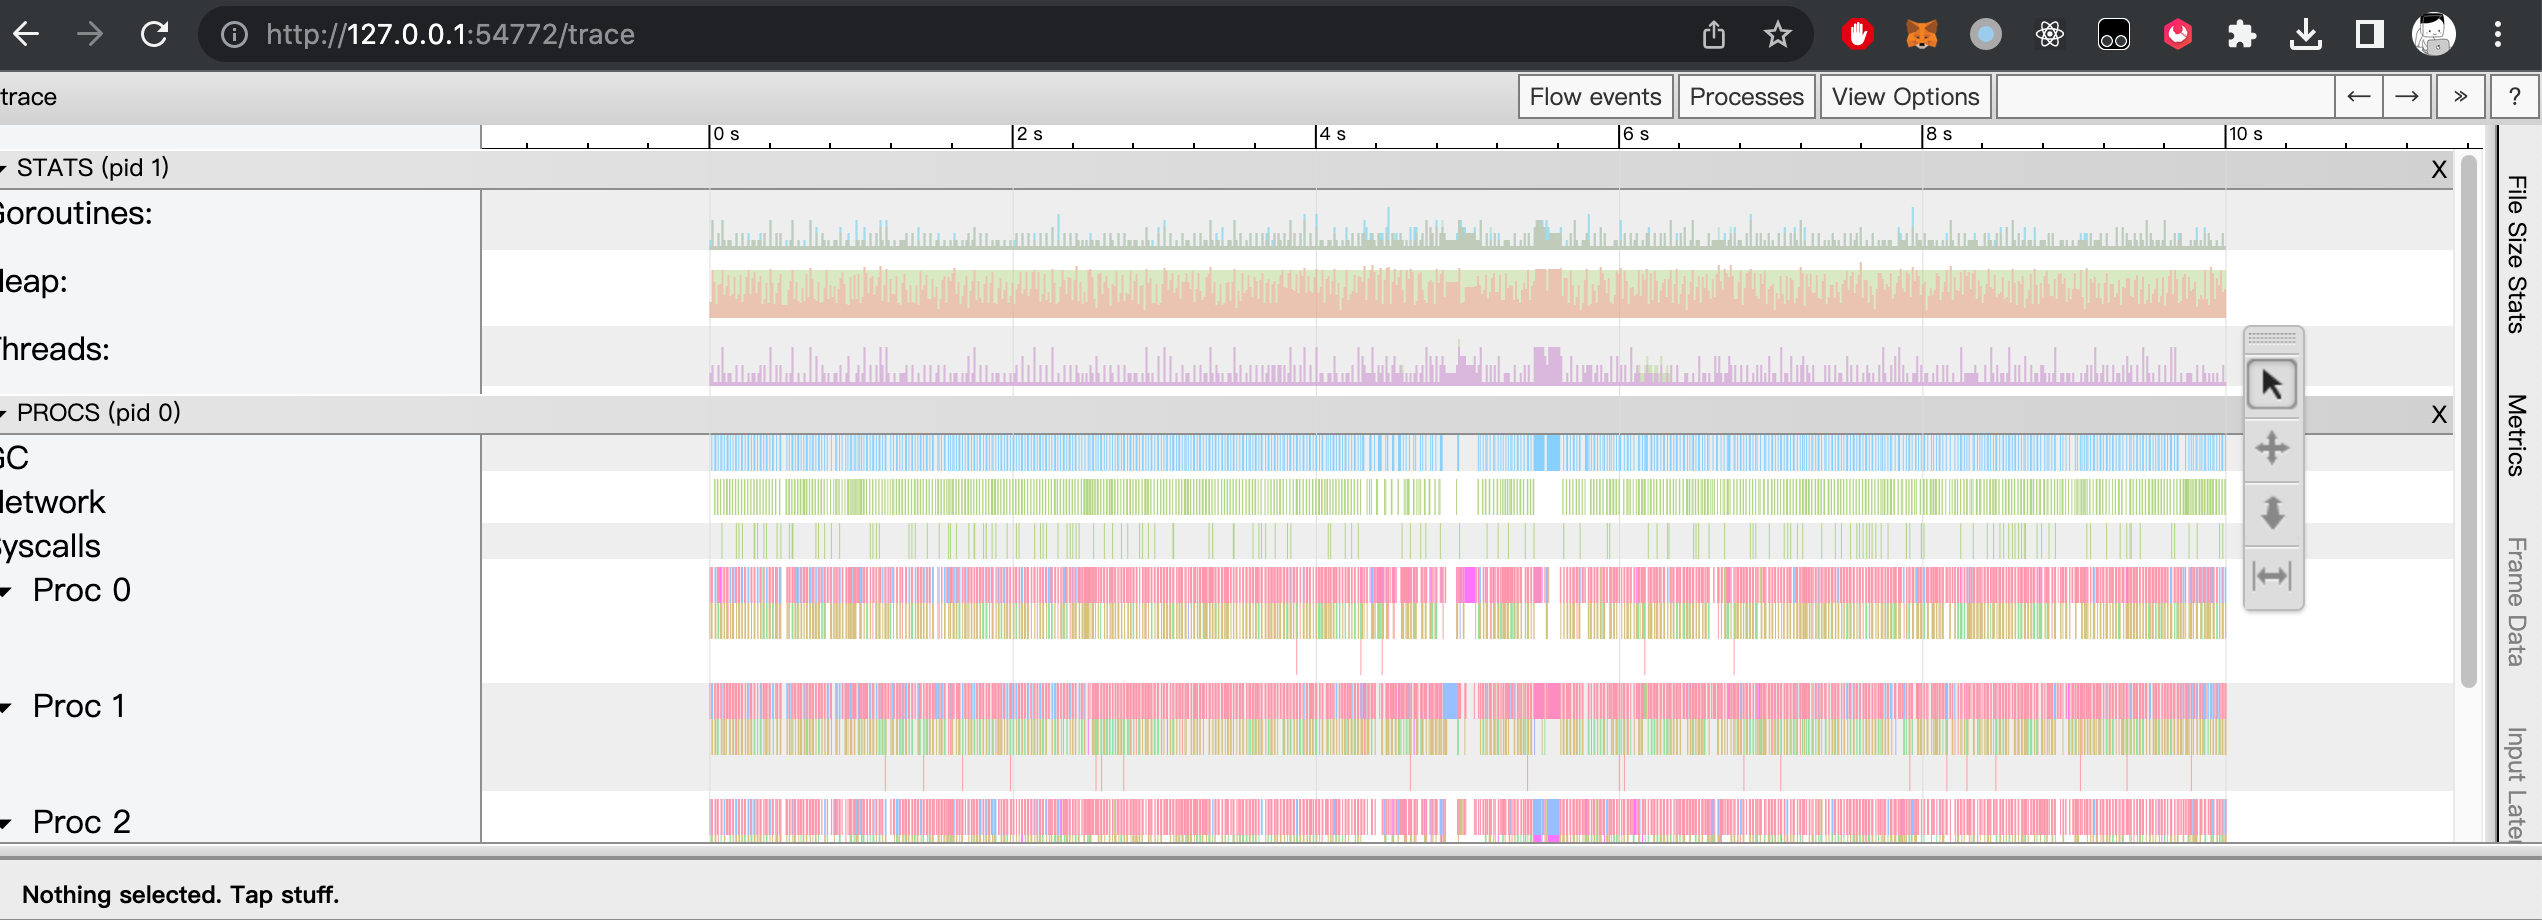
如果需要看一段时间内的运行状态,需要用到go tool工具,go tool工具有两个方法,一个看pprof统计和trace。下面分开介绍。
1 | curl "http://127.0.0.1:10397/debug/pprof/profile?seconds=10" -o p.out #获取最近10s的profile信息 |
浏览器能直接看到刚刚profile信息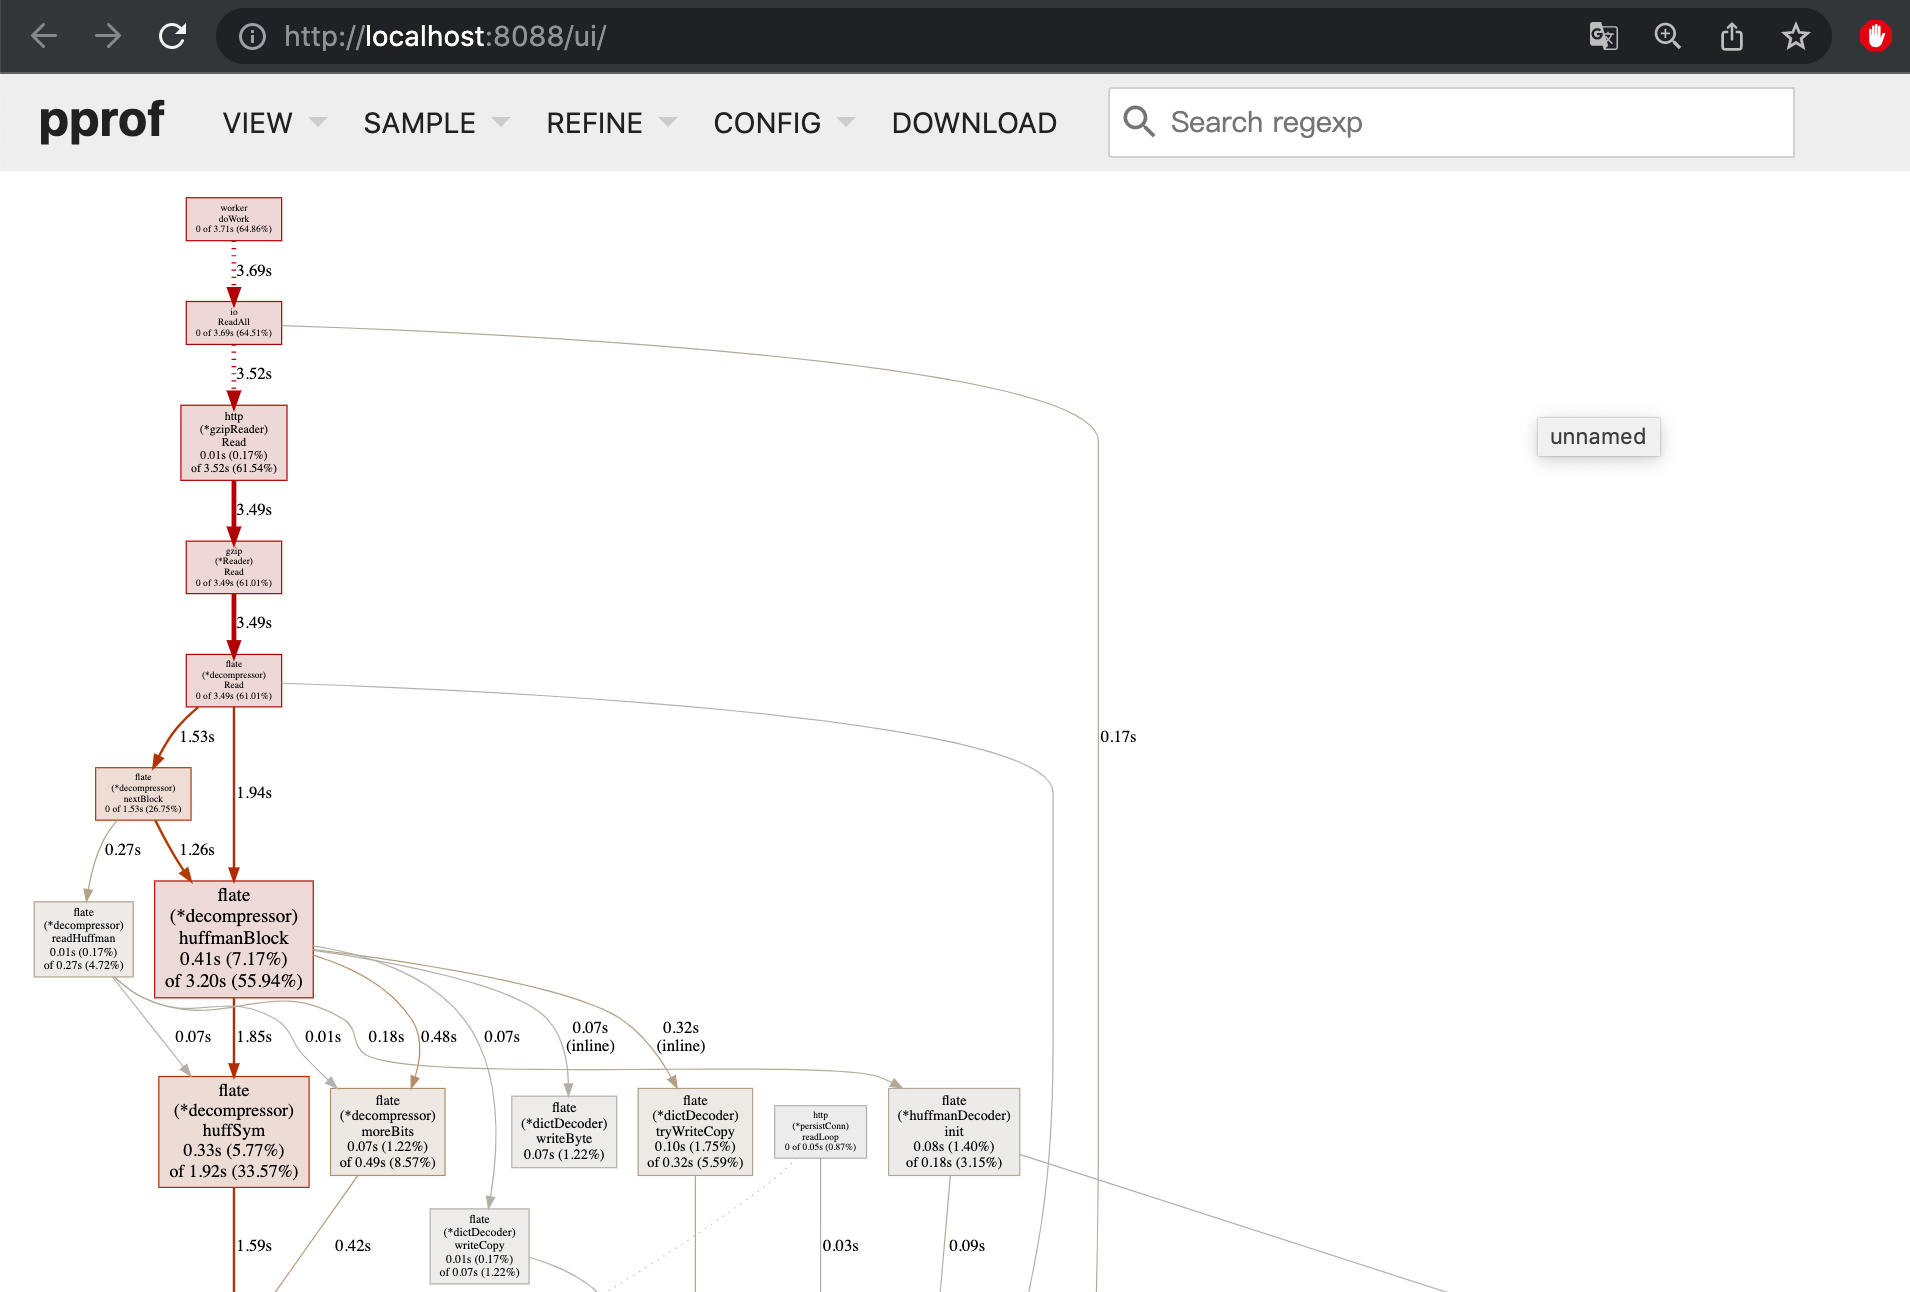
切换菜单就能看到最常用的火焰图。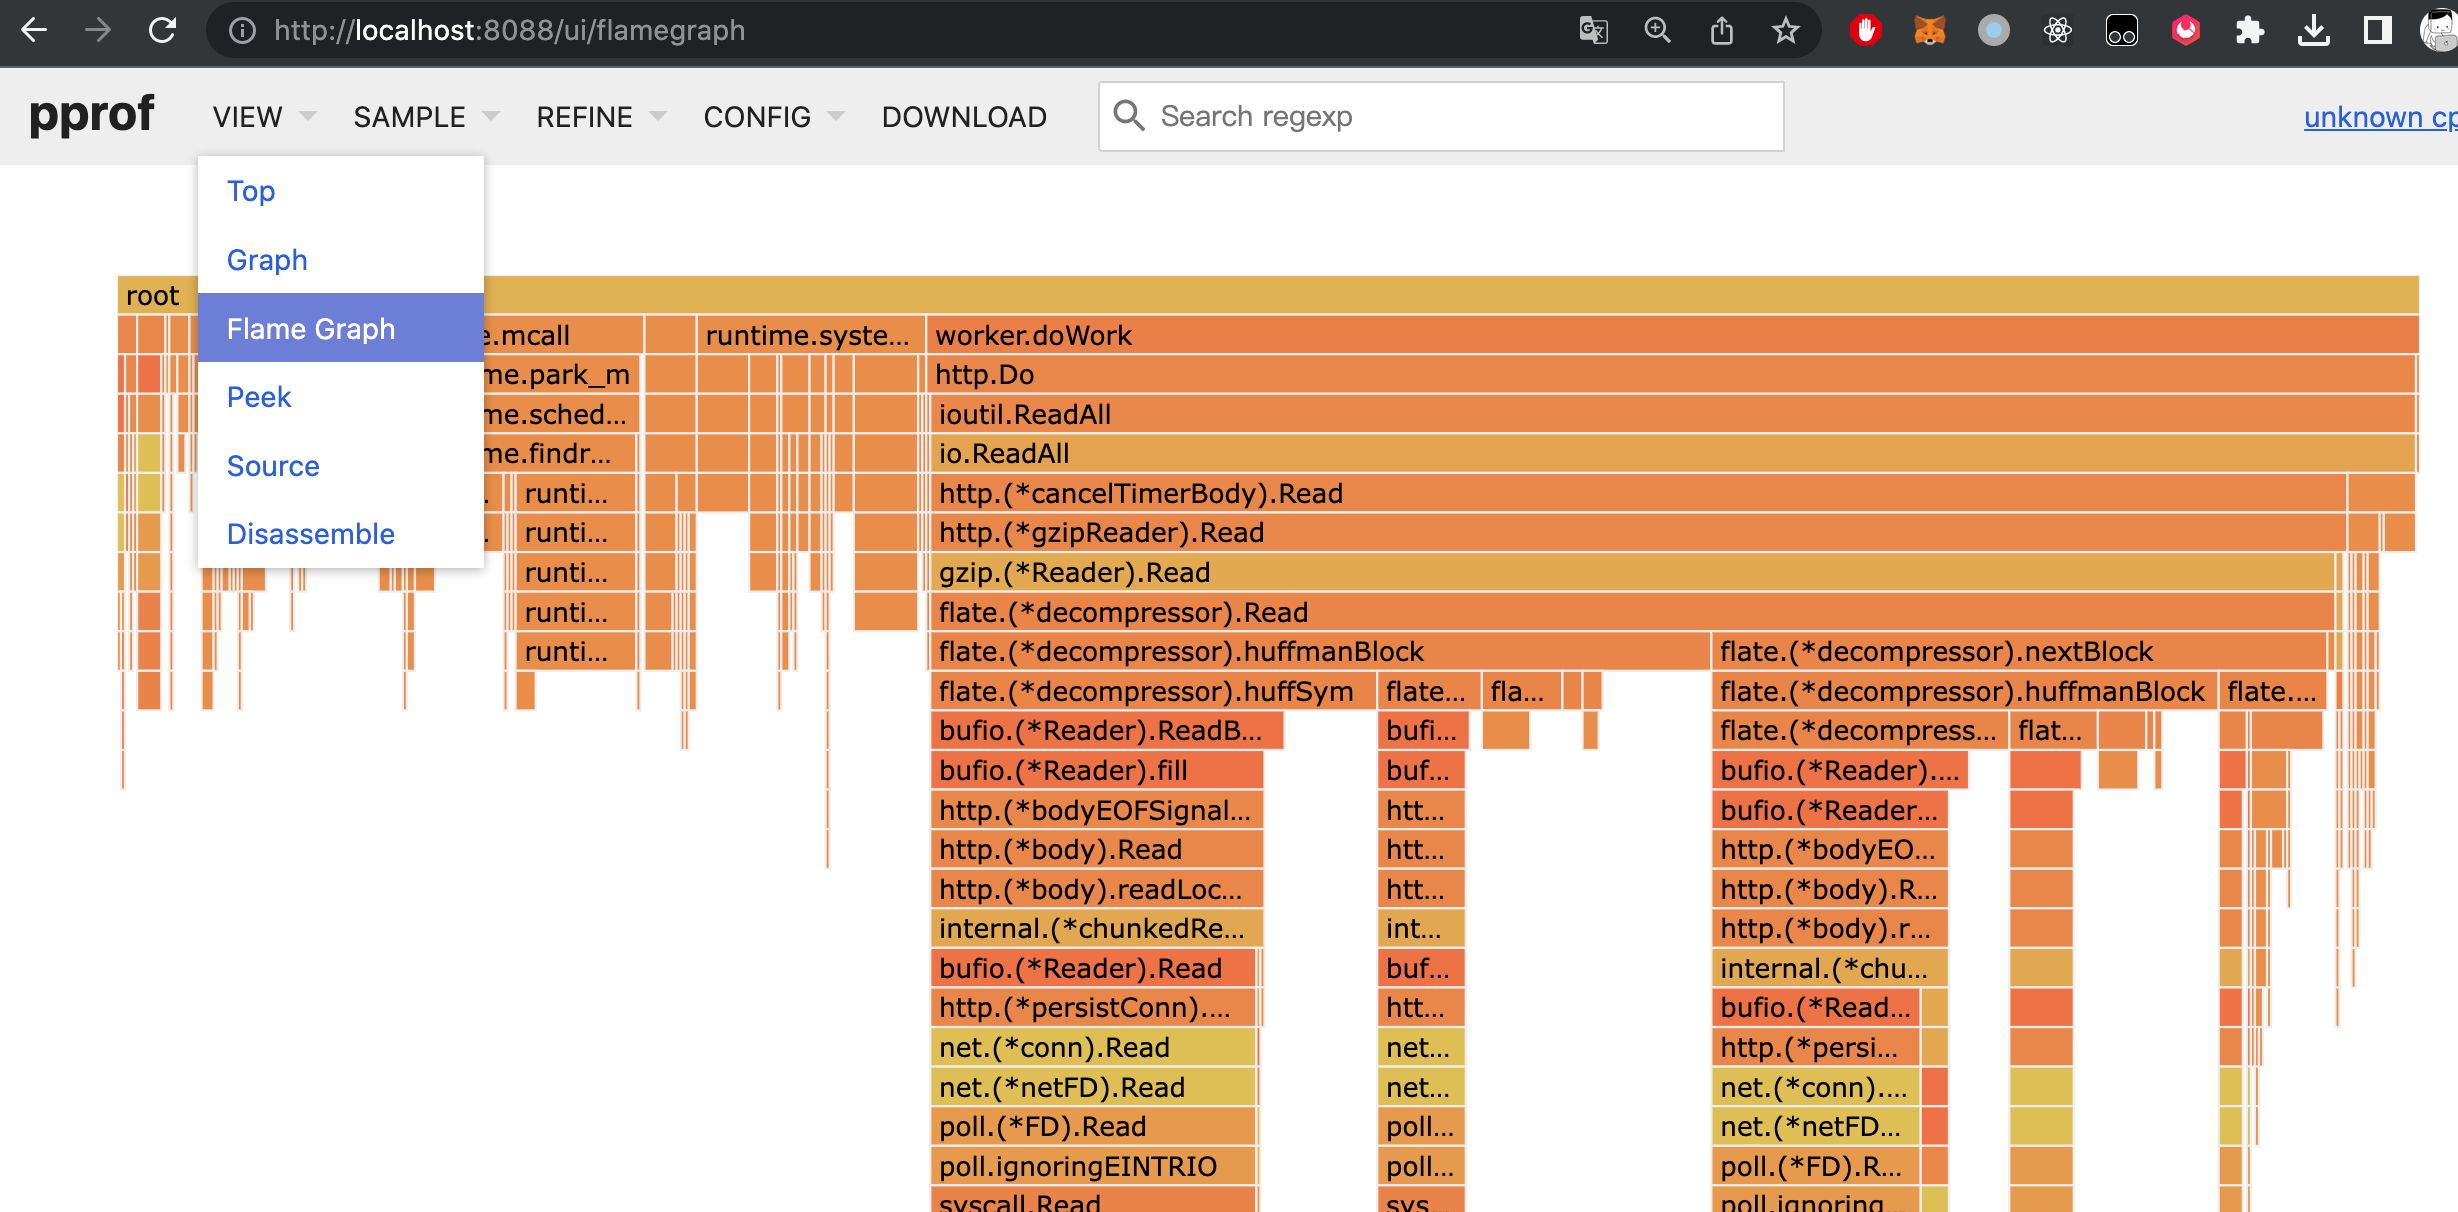
1 | curl "http://127.0.0.1:10397/debug/pprof/trace?debug=1&seconds=10" > t.out #获取远程trace文件 |

我的blog一直使用wordpress。服务器一直也蹭朋友的服务器。朋友的服务器终于要停服了。 我也需要为我很少更新blog找一个永不停服的服务器了。
最终选定方案为白嫖github page。 使用hexo创建静态的blog页面,然后通过github page免费发布,通过cloudflare CDN进行加加速。
1 | yarn global add hexo-cli #全局安装hexo |
在github创建一个公开项目。将刚创建项目提交github。
在github action 创建hexo编译发布脚本。
创建 deploy, 脚本每次master有提交时进行编译,然后将编译结果提交到blog分支。代码如下:
1 | # This is a basic workflow to help you get started with Actions |
如图所示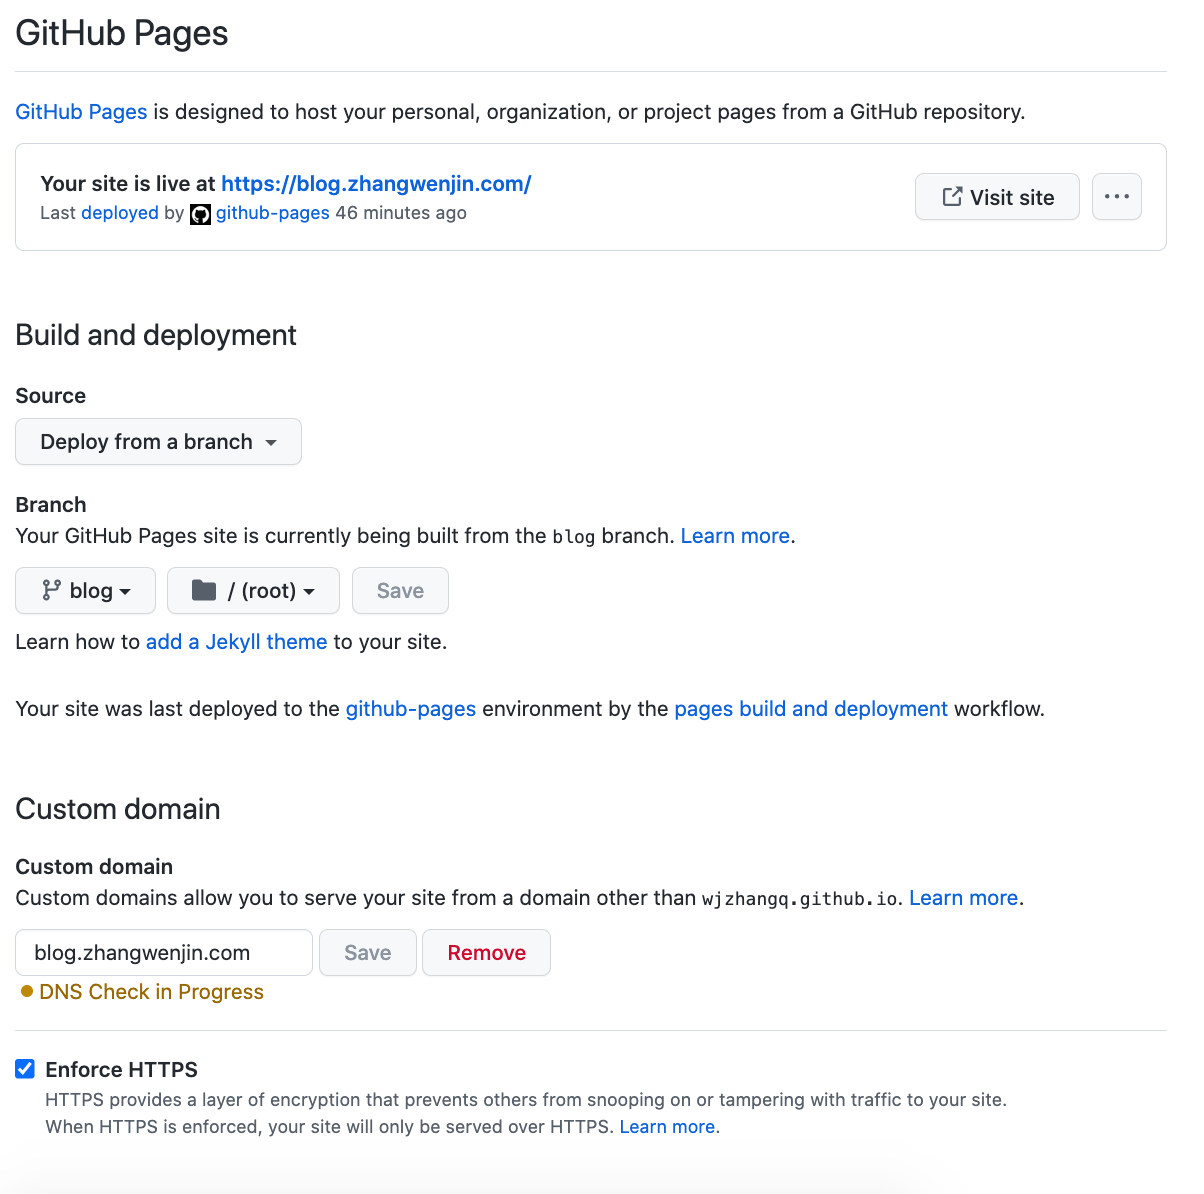
在DNS中开启 Proxied 即可
如果启用了https,需要在在ssl配置中启用full模式,即github负责申请https证书,cloudflare负责转发
整个包只有70M,包含mysql和redis。
直接上dockerfile。
1 | FROM php:7.4-fpm-alpine3.11 |
直接上代码。
1 |
|
公司一个业务的Mysql user表总是莫名被修改。项目太老懒得去找具体原因了。
最终觉得偷懒使用mysql触发器,将所有user表的改动记录到一个user_log表,如果用户信息被修改,通过查询user_log就能帮用户数据恢复为以前版本。
具体操作如下:
创建user_log 表
1 | CREATE TABLE `t_user_log` ( |
创建user表insert触发器
1 | DELIMITER // |
创建user表update触发器
1 | DELIMITER // |
查询所有触发器
SHOW TRIGGERS;
安装centos蓝牙库:
1 | yum install bluez.x86_64 bluez-compat.x86_64 |
安装蓝牙认证库:
1 | yum -y install pygobject2 dbus-python-devel.x86_64 dbus-python |
配置dhcpd:
1 | vim /etc/dhcp/dhcpd.conf |
上网设置:
1 | brctl addbr pan1 |
问题:公司租用多台阿里云主机,只有1台对外服务,其他服务器只能访问内网。内网机器偶尔需要访问外网,但又不希望开通外网访问权限。
解决方案:将阿里云服务器重新组建一个虚拟局域网,有外网权限的服务器做为网关,其他内网服务器通过网关就能访问外部网络。
穿透阿里的内网可选用ipip tunnel 或者gre模式,本文选用通用性比较好的gre模式。
外网机器:
a. 打开ipv4转发:
1 | echo 1 > /proc/sys/net/ipv4/ip_forward |
b. 增加转发规则:
1 | iptables -t nat -A POSTROUTING -s 192.168.122.0/24 ! -d 192.168.122.0/24 -j MASQUERADE |
c. 建立内网隧道:
1 | modprobe ip_gre #加载gre内核模块 |
内网需要上网机器:
a. 建立隧道
1 | modprobe ip_gre #加载gre内核模块 |
b. 设定默认路由
1 | route del default |
ps停用隧道方式:
1 | ip link set gre1 down |
1 | uid = root |
1 | killall rsync;/usr/bin/rsync --daemon |
1 | rsync -avzP rsync://10.132.35.216/test /opt/test |
1 | yum install 3proxy |
1 | export http_proxy=http://10.10.1.2:6666 |
1 | vim /etc/yum.conf |